This course is intended for everyone, regardless of their experience level, who wishes to capture images from local and exotic wildlife. The course will cover the basics of wildlife photography as well as the best places to photograph your favorite subjects. You'll also learn to get close enough to your subject. The course includes great tips and tricks on how to keep safe while photographing wildlife.
Camera settings
Wildlife photography requires you to be familiar with camera settings. It is vital to learn more than just how you can switch between Aperture Priority and Shutter Priority. Wildlife photography is difficult. These tips will help you take the best wildlife photographs.
Take into account the speed at the which you take the photograph. This setting is vital for wildlife photography. It will have an impact on the sharpness and depth of field as well as the artistic effect. You will need to select a shutter speed that is appropriate for your needs based on the subject, time of day and focal length.
Lenses
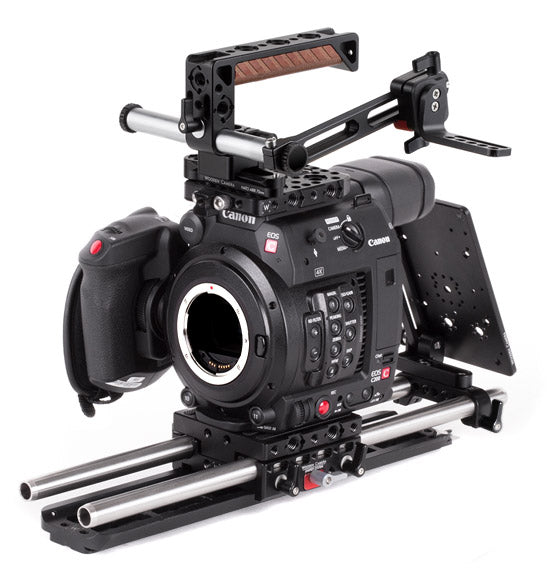
Lenses for wildlife photography need to have the right optical properties and be able to handle the conditions you're likely to encounter. Canon lenses, such as the XL, are famous for their sharpness, and they have a long track record of high performance in this category. They are more costly than the less expensive brands but they will provide years of reliable use.
A good wildlife lens will offer you a variety of framing options. A wide range in focal lengths can help you capture the best view of an animal, or any other subject. This is vital when photographing wildlife. For wildlife photography, you will also want a lens that has a large aperture.
Photos of wildlife taken in locations
There are many places you can photograph wildlife and nature, if you're a lover of the outdoors. The wilderness is one of the most beautiful places to photograph wildlife. Glacier National Park, for example, is home to bighorn sheep. It is possible to see these animals closer in other areas. You can then wait for the right moment to snap a picture.
Many people do not realize the possibility of encountering wildlife right in their back yard. Botanical parks and gardens are home to wildlife that is not shy like wild wildlife. It's easy to capture great wildlife photos by simply walking around these areas. Another great spot to photograph wildlife is a lake. Many species find freshwater lakes attractive because they are filled with water. Some species even find food in the water.
Getting close to your subject
In wildlife photography, it is important to get close enough to your subject to capture great shots. A stunning photograph is only possible if the animal feels comfortable and relaxed. You can accomplish this by getting low to the ground and keeping your head low to get your subject's attention. After you have reached eye level, slowly move closer and keep an eye on your subject from the corner. Take a few test shots while you get close to your subject to help them become more comfortable with the sound of the shutter. Don't rush.
While wildlife photography is an amazing experience, it's important to avoid stressing the animal. People can scare many animals and it is dangerous to get too close. You should be aware of your surroundings and take care not to step in mud puddles.
Use a tripod
Tripods can help you take better photos of animals, birds, and other wildlife. A tripod can be used to support large weights, but still allow your camera to move freely. There are many different types of tripod heads. For wildlife photography, you will need a head capable of supporting large telephoto lens. Many ball heads have a weight limit, but some can handle the entire weight.
The Really Right Stuff TVC34L MK2 tripod is ideal for wildlife photography. This tripod has lower sections and is stronger. This lower section allows the camera's movement from vertical to horizontal with minimal motion.
Prepare for tough conditions
Photographing wildlife in difficult conditions requires that you be ready for all eventualities. Weather can quickly change and you could be caught in a severe storm, high winds or snowstorm. You can avoid this by checking the weather satellites in advance, especially if traveling to remote locations. However, a snowstorm may add dramatic effect to your images. Being caught in the middle can lead to disaster.
Wildlife photography is a difficult art form that requires patience, skill, dedication, and patience. It is important to learn as much information as possible about the species that you wish to photograph. Learn about their habitat, the best times to photograph them, and any other factors that could impact the animals. In addition, you must protect your gear from the effects of harsh weather conditions.
Photography from a plane
It is an amazing way to capture the beauty and wonder of the natural world from a plane. This involves the pilot flying at 1,000 feet above the ground with a wide-angle or telephoto lens. In recent years, drones have been developed to produce aerial images. These drones are capable of capturing more intimate shots.
When taking photographs from an airplane, you'll want to be careful not to get obstructed by the plane. The best way to get the shot is to move the aircraft slightly away. It is not easy to avoid large obstructions so be prepared. A lens with vibration reduction is a must. A slow shutter speed is essential. If you can, try to get a shutter speed of 1/125 second or 1/25 second.
FAQ
Light Room can be used to enhance your photographs.
It is important to begin early in order to have great photos. It's better to take as much as possible, then select the best.
Lightroom allows you to do this by letting you see how different settings affect each photo. These settings can be adjusted on the fly without having to go back into Photoshop. This allows you to quickly test what looks great and what does not.
What Camera Should You Get?
That all depends on what kind of photographer you want to become. A basic point and shoot camera is enough if you are just starting.
However, once the basics are mastered, it's likely that you will want more advanced features. The decision is yours.
Before you buy a camera, here are some points to remember.
-
Features: Which features are most important? Do you plan to use manual settings, autofocus, or both? What number of megapixels has your camera? Is there a viewfinder?
-
Price: How much do you want to spend? Are you looking to replace your camera every few years?
-
Brand: Will you be happy with the brand you select? You shouldn't settle for less.
-
Functionality: Can your camera operate in low light conditions well? Do you have the ability to take high-resolution pictures?
-
Image Quality: How sharp and clear are your images?
-
Battery Life: How much time will your camera last without needing to be recharged?
-
Accessories: Are you able to attach additional lenses or flashes? ?
Do I Need A Tripod?
This is one of those common questions. The truth is that a tripod isn't always necessary, but it can come in handy.
This allows you to keep your camera steady even when taking slow shutter speeds. A tripod can make all the difference when you're photographing landscapes or other stationary subjects.
However, using a tripod to photograph moving subjects like people or sports can result in blurriness. How do you decide which situations are best served by a tripod.
A tripod is an essential tool for photographing fast-moving subjects or stationary objects. Examples include:
-
Sports
-
People
-
Landscapes
-
Close-ups
-
Macro shots
Do this test to see if you are unsure if you require a tripod. Hold your camera still and look through the viewfinder. If blurred lines appear or you feel movement, you will definitely need a tripod.
If you don't see any blurring, you probably won't notice any improvement by adding a tripod.
Here are some tips for those who do decide to buy a tripod.
-
You should ensure that your tripod has smooth legs. This will prevent unwanted vibrations from shaking your lens.
-
A tripod is a good choice. Some tripods may be made from plastic, which can make them less durable. Look for a metal tripod instead.
-
Consider purchasing a remote release. You can control your camera remotely with this remote release. The button can be pressed to activate the shutter.
-
A tripod that can rotate 360 degrees is a good choice. It makes it easy to position your camera horizontally or vertically.
-
Remember that tripods can be expensive. Expect to pay between $100-200. But, you will get a lot for your buck.
-
Accessories like memory cards and filters should not be forgotten.
-
Before ordering online, you should check in your local shops. Many retailers offer free shipping.
-
Read reviews to determine what customers think about a particular product.
-
Ask family members and friends who own similar products.
-
To learn more about customer experiences, you can visit forums and message board.
-
User reviews can be found online.
-
Amazon.com allows you to compare prices, and receive customer feedback.
-
Check out these photo galleries for an example of the work that photographers do with their tripods.
Where to Buy Cameras?
You can find many places online to buy cameras. B&H Photo Video is a reliable retailer. They have knowledgeable staff who can answer all your questions.
B&H ships quickly and securely to make it easy for you to get your order to your door.
This video will explain how to shop for cameras.
Which is the best camera to use for beginners?
The best camera choice for beginners is determined by your budget, skills, and needs.
For instance, you could choose a point & shoot digital camera if your goal is to save some money. These cameras aren't as versatile as they look, but they provide good quality.
The Digital Single Lens Reflex (Digital DSLR) camera allows you to interchange lenses, allowing you to take different kinds of photos. These are typically more expensive than point-and-shoots, but they provide much greater flexibility.
For those new to photography, a beginner's kit is a great place to start. The package includes everything you need: a camera, lens, memory cards, tripod, flash and a camera body.
Do not forget to get extra batteries!
How can you become a skilled photographer?
Photography is an art form that requires patience, dedication, passion and dedication. Photography is a passion. You will be able to do much more than if your goal was to make a buck.
It is essential to understand how to use your camera effectively. You need to be able to comprehend composition, lighting, exposure, depth-of-field, and other aspects of photography. You also need to have a decent understanding of Photoshop.
It is hard to master photography, but it is worth the effort.
You can improve your skills by reading books, attending classes, and participating in competitions. You will gain confidence and experience, which can lead to improvements. What equipment are you looking for?
It really depends on what kind of photography you like to do. A wide-angle lens is necessary for landscape photography.
If you're interested in portrait photography, you should get a telephoto zoom lens.
A tripod is crucial for taking photographs. A tripod allows you to stand still and compose your photograph without having to move.
A camera bag is useful for carrying your camera, memory cards, and other accessories.
If you use a compact camera, a flash unit is required.
A DSLR (Digital Single Lens Reflex), is the best camera choice for beginners who want professional quality photos.
DSLRs are popular because they allow you to control every photo aspect, including shutter speed, aperture, ISO sensitivity, white balance, focus, and more. They also provide a range of features such as autofocus, auto-exposure lock, self-timer, bracketing, and RAW format.
Is photography a talent or a skill?
Photography is not a skill, but an art form. This requires years of practice, training, and experiences. The art of photography requires years of practice and dedication to mastery.
Photography is also a business where you need to have a plan for how you are going to make money from it.
You need to know what type of clients you are looking for and how you can reach them.
You must know their identity and what they want. To persuade them, you must communicate clearly and persuasively.
This means you need to be prepared and well-organized when meeting potential clients.
A portfolio of your work is essential in order to be able to approach potential clients. You can either create a portfolio digitally with software programs, or print it on paper.
Once you have compiled a portfolio of work, you should start looking for opportunities to display it. You can either approach businesses directly or advertise online.
Statistics
- Get 40% off Adobe Creative Cloud(opens in new tab) (creativebloq.com)
- There are people out there who will pick at flaws they can only see in 100% crops of your photos. (wikihow.com)
- The second easiest way to get blurry photos 100% of the time is to use a cheap filter on the front of your lens. (photographylife.com)
- While I cannot prove that all of those spots were not sensor dust, the photo was taken during a heavy snowstorm…so I guess that 99.8% of the spots are snowflakes. (bhphotovideo.com)
External Links
How To
How to take pictures in low lighting conditions
Low-light photography means taking photos in dimly lit areas. It requires special equipment and techniques. The key challenges are in controlling exposure, white balanced, and sharpness. There are two types low-light photography: ambient and flash. Flash photography works best when there's enough light around. A flash is required if there isn’t enough light. If your subject is outdoors but indoors, you might not have enough light to take a great picture without a flash. Try shooting at night, during the moonlit hours, if you don't need a flash. This will allow you to get nice shadows and colors. Another option is shooting at twilight. Twilight occurs when the sun has set, but there is still daylight left.
You may also want to experiment with long exposures. Long exposures enable you to take images even after your shutter has been open for several seconds. The camera records only light that falls on it if the shutter is not closed. During a long exposure, this light continues to fall onto the photo sensor. But, the shutter remains closed and no new light enters. Therefore, there is very little movement. Turn off autofocus and autoexposure to ensure you get clear images. Also, make sure that you adjust the ISO setting before you start shooting. An ISO setting of 200 gives you more flexibility to control how bright or dark your image looks. Finally, when you're ready to take the shot, press the shutter button quickly. This causes the shutter to close completely. You should then hold down the shutter button for as long as possible. You can prevent any additional light entering your camera by holding the shutter button down. Once you have taken your picture, wait for a few moments before you release that shutter button. This allows the camera to process the image. While the image is processing, you can see your photos on your computer monitor. Once you're satisfied with them, save them to your computer.