Although it can be difficult to take night photos, it is not impossible. These tips can help you improve your night photographs. These techniques can make your pictures look better than ever, and can help you get more professional-looking shots. In this article, we'll go over lenses and exposure modes, as well as techniques. You'll be better prepared to face the challenges of low-light and night photography. Hopefully, you'll get the best pictures possible.
Guide to low-light photography
This comprehensive guide is perfect for amateur photographers or those who want to improve their photography skills. Many people view night and low-light photography as frustrating and difficult. This book dispels these myths and shows you how to capture stunning images in these situations. Nina Bailey is a former Canon employee who has also been a lecturer. The guide includes lots of tips and tricks for dealing with extreme contrasts, as well as other challenging situations. The book has projects and assignments. This allows readers to practice and upload photos to a website that can be analyzed.
Techniques
To take photos at night, you will need to use the right settings to minimize camera shake and blur. The settings you choose for your camera will help you get the best results, and it is important to make sure that you are using a tripod to ensure that you have the best exposure possible. Aperture priority (AP) or manual modes can be used to control the operation of the camera, except for the shutter speed. These are ideal for photographing still objects like buildings. They are also the most safe. You should also use manual focus. Even though auto-focus might be more convenient, manual focusing will create sharper photos.
Lenses
If you're interested in night photography but are limited by a low budget, there are several lenses to choose from. Canon EF 24 105mm IS USM is a high performance zoom lens that excels in low light situations. The f2.8 maximum aperture makes this lens ideal for low-light situations. Additionally, the image stabilization system ensures sharp images. This lens can be purchased at a reasonable price.
Exposure modes
Shutter priority mode can be one of the best ways to capture light at night. Shutter priority allows for you to control the aperture and shutter speed, creating stunning light streaks as well as beautiful landscapes. Make sure to take several test photos before you decide on the exposure that will give you the desired results. To create light trails that are vibrant and long, you can either use a slow shutter speed or a high shutter speed.
Preparation
Photographing at night requires safety precautions. To avoid damage or fogging, take extra care when using your camera. Proper clothing is another important consideration when night photography. A sudden weather inversion can turn your pleasant evening into an uncomfortable endurance test, so be sure to bring thin layers and items that will keep everything comfortable. These tips should help you take beautiful night shots. If you're unsure, try a few of these tips:
FAQ
Is photography a talent?
Photography is an art form, not a talent. It requires training, experience, and practice. It takes years to master any aspect.
Photography is a business. You must have a plan to make money.
This is possible by understanding the client type you wish to attract, and then finding ways to reach them.
You need to know who they are and what they want. To persuade them, you must communicate clearly and persuasively.
This means you must be prepared to meet potential clients.
Before you approach potential customers, it is necessary to compile a portfolio. This can be done digitally using software programs or printed onto paper.
Once you have created a portfolio, you must look for opportunities to show it off. This could include advertising online or directly approaching businesses.
Which Lenses should I Use?
The most common question beginners ask is, "what lens should I buy?" This is a difficult decision because there are so many options.
The good news is that you don't necessarily need to buy a new lens every time you purchase a new camera. You can instead add lenses later.
For starters, here are three types of lenses you might want to consider.
-
Wide Angle Lens (14mm-24mm): These lenses have a wide view angle that will allow you to capture more of your subject. You can also zoom in without losing image quality.
-
Normal/Standard Zoom Lens (28mm to 70mm) : These lenses allow you the flexibility of changing focal lengths, while still maintaining high quality images.
-
Telephoto Zoom Lens (70mm–200mm) : These lenses are ideal for photographing distant subjects. These lenses allow you stay focused on your subject even when they appear small.
These lenses can be combined in a variety of ways to create new effects. To capture close-up details, you can switch between a normal and telephoto lens.
Is digital photography hard?
Digital photography is not as simple as it seems. It takes time and effort to learn how to use the tools properly. To be able to take different types of shots, you must know what settings are appropriate. It is best to practice what you have learned. Practice makes perfect.
What makes a good camera backpack?
A camera bag protects your gear and is essential when traveling. These are some important things to keep in mind as you choose a bag.
-
Size: Choose a big bag to hold your camera and accessories comfortably. Don't go bigger than you think you will need.
-
Durability: Buy bags made of durable materials like canvas, nylon or leather. Avoid using plastic bags or fabric bags.
-
Protection: Make sure that your bag offers protection against dirt, moisture, and scratches
-
Organization: Consider organizing your gear by type to easily access your needs. Your lenses, memory cards, and battery charger can be placed in different compartments.
-
Comfort: Avoid carrying around a bulky bag when you are shooting. Instead, carry a shoulder belt. A comfortable design should have padded straps.
-
Price: Check around to find the best prices. Discounts are sometimes offered by some brands, which can be a bonus.
-
Warranty: Make sure to ask if they offer a warranty for their products. If your bag is damaged or lost, this will let you know who to contact.
Statistics
- In this case, 100% of readers who voted found the article helpful, earning it our reader-approved status. (wikihow.com)
- By March 2014, about 3 million were purchased monthly, about 30 percent of the peak sales total. (en.wikipedia.org)
- There are people out there who will pick at flaws they can only see in 100% crops of your photos. (wikihow.com)
- The second easiest way to get blurry photos 100% of the time is to use a cheap filter on the front of your lens. (photographylife.com)
External Links
How To
How to take pictures in low lighting conditions
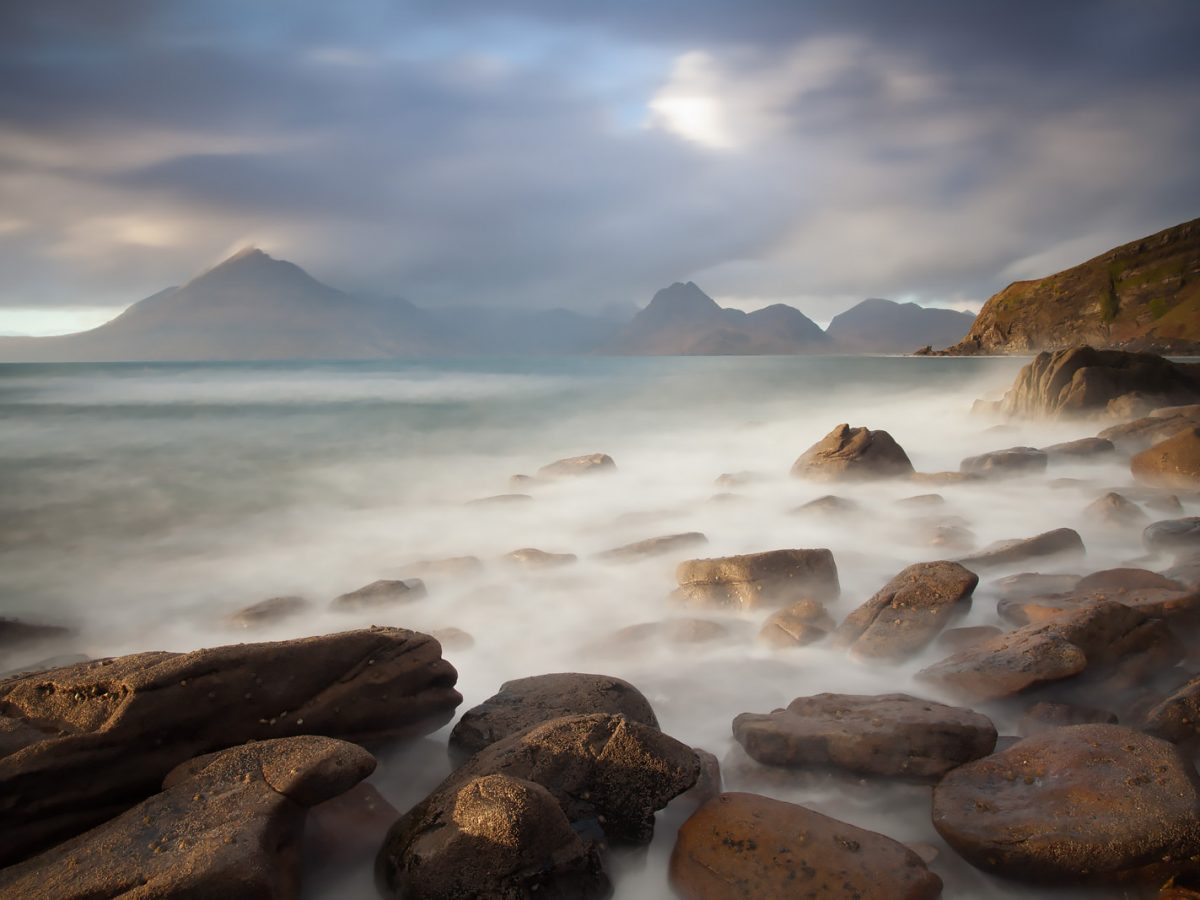
Low-light Photography is when you take photos in dimly lit or dark environments. It requires special equipment. The main challenges in this field include controlling exposure, whitebalance, and sharpness. There are two kinds of low light photography. Flash photography is best when there is enough light. However, if there's not enough natural light around you, you'll need to use flash. For example, if your subject is indoors but outside, there might not be enough light to capture a good picture without a flash. You can also shoot at night when the moon is shining. This way, you'll get some nice colors and shadows. Another option is to shoot during twilight. Twilight happens when the sun has set but there is still daylight.
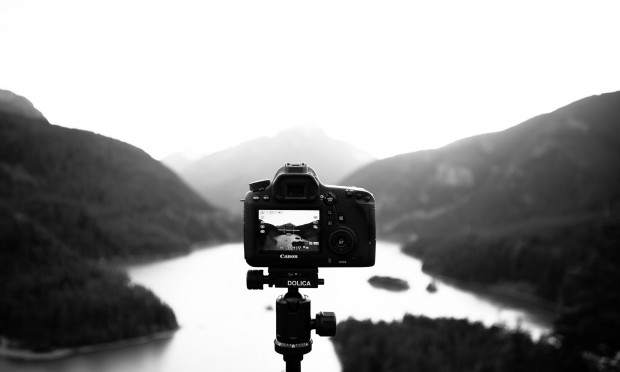
You might also be interested in long exposures. Long exposures allow you to record images after the shutter has been open for several minutes. If the shutter is closed, the camera records only the light that falls onto the sensor. This light falls onto the sensor even after a long exposure. Because the shutter was closed, no new light enters your lens. You will see very little movement as a result. Turn off autofocus and autoexposure to ensure you get clear images. Make sure to adjust the ISO setting before starting to shoot. An ISO setting of 200 will give you more control over the brightness or darkness of your image. Once you are ready to click the shutter button, make sure it is fast. The shutter will close completely. Keep the shutter button pressed down until the last second. The shutter button should be held down to prevent more light from entering the camera. Once you have taken your picture, wait for a few moments before you release that shutter button. This allows the camera's to process the image. While waiting, you can check out your photos on your computer screen. When you are happy with your photos, save them to the computer.