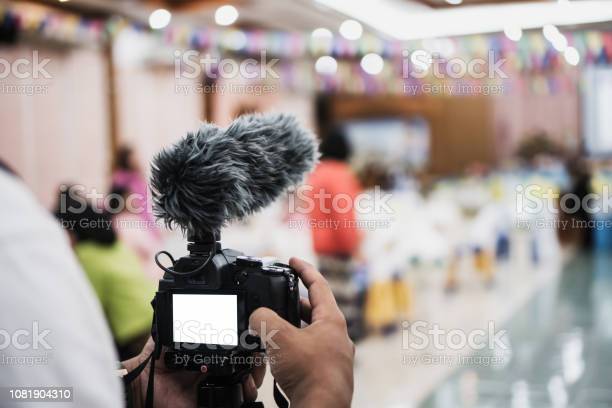
A contract for photography should outline the rights and responsibilities of both parties. Photography is a two way agreement. Clients may require collaboration. A contract is a written agreement that outlines the expectations of both the client and the photographer. The contract also clarifies the ownership of photos as well as license terms. These terms should be concise and clear.
Advice from a lawyer
It is essential to define who each party will be responsible for, and what the photographer's role is. You should, for example, specify how many photos you would like and what format you prefer. It is also important to specify the delivery cost and any additional items that you will require. You should also be able for the photographer to get all permits.
A contract should also clearly state who owns the rights to the photos. Many times clients don’t understand that the photographer holds the legal right to use the images. A contract should include a copyright provision. This clause provides legal protection for you in the event of unpaid invoices or unauthorized use your photos.
Contents of a photography contract
A photography contract describes the terms and conditions for the project as well as the responsibilities of both photographer and client. These include the terms and conditions of payment, material and tool use, as well as usage rights. It should also specify any fees that will be incurred in the event of rescheduling or cancellation.
The contract must also state the start and end date of the shoot. The contract must also indicate the location of the shoot along with any deliverables. Separate property releases or models are common for photographers. These releases should also be included in the photography contract.
A contract for photography has legal implications
It is important to know the legal implications for your contracts if you are in the photography industry. It does not matter how skilled your talent is, it is vital that you are paid fairly for your work. Do not risk being sued if you don't follow the rules.
Photographers need to sign a contract with each client. It will protect both your client and you. It will define the rules and procedures that will govern the business relationship. The contract will allow you to maintain good communication between your client and yourself.
Rejection fee in a contract for photography
Photography contracts should clearly describe the scope and payment terms for work, as well as delivery and refund fees. This will protect your interests and prevent miscommunication. A photography contract offers more legal protection than verbal agreements. Moreover, a contract should be signed in writing, which will ensure that both parties agree to the terms of the agreement.
Additionally, the contract should outline the rights of Photographer. Reproduction refers to any alteration or projection of the photograph, as well as electronic or mechanical reproduction or transmission. This includes any image sharing website or service.

Conditions for signing a photography contract
It is essential to ensure that you have a contract for the photographer you are considering hiring. You should list the dates and times of the shoot, as well as the locations and the deliverables. You should also outline cancellation terms. In case of an unwell photographer or an early departure, it is important to outline your rights.
Although contracts for photography may be restrictive, they are essential to ensure that you protect your customers as well. Many contracts are written using legalese that can be confusing to customers. You should choose one that is clear and simple. You should ensure that your contract is as comprehensive as possible and include any information that is of value to your clients.
FAQ
How can I look good on pictures?
The best way to ensure you look good in photos is to take them yourself. You will learn how to pose, which angles are flattering and which are not. You'll also learn how to use lighting and props to enhance your natural beauty.
You'll learn how to find clothes that fit and make up that looks great on your skin.
We'll also show you how to retouch images with Photoshop or other editing software if you aren't satisfied with the results.
So, go ahead - take some self-portraits!
How can my phone improve my photo skills?
Photography doesn't have to be expensive. Amazing images are possible with just a smartphone.
It is easy to learn how to use its various features and some basic techniques.
There are many apps available for both Android and iOS devices that make it easy to edit and share your pictures.
These five tips will help you take better photos.
-
Set Up Your Camera App. Your camera app should come pre-installed on your device. Download it from Google Play, Apple's App Store or Google Play.
-
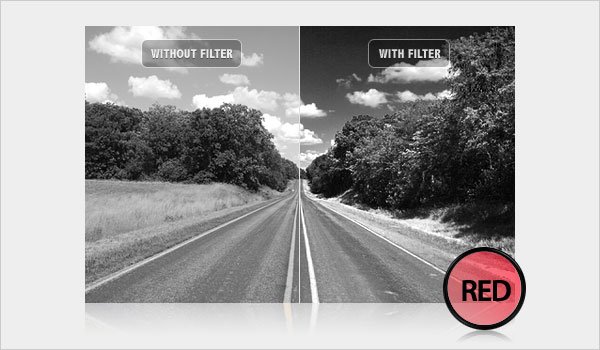
Use effects and filters. You can alter the appearance and feel of your photo using filters and effects.
-
Adjust the exposure. You can control the brightness by changing your exposure.
-
Use the Right Lighting Bright light allows you to better see the details of your subject. You can capture highlights and shadows in low-light conditions.
-
Take Pictures Of People. Take pictures of people to show them what you love the most.
Check out this article to learn how to take better pictures with your smartphone: 5 Tips To Improve Photography Skills
What can I do to learn photography?
There are many methods to learn how you can take amazing photos. There are several options. You can read a book, go to a class, or join an internet community. There's no better way to learn the art of photography than by doing it yourself. So you can decide what goes into each picture. As long as you continue learning, you will always be improving.
Digital photography doesn't require expensive equipment. All you need is an internet connected computer and a camera. The rest is up for you.
Here are some tips to get you started.
-
Acquaint yourself with the manual settings of your camera.
-
Learn how to use the controls.
-
Make sure to take lots of pictures.
-
Edit them.
-
These are yours to share.
-
Keep practicing.
-
Experiment.
-
Explore different perspectives and angles.
-
Use light sources creatively.
-
Practice makes perfect.
-
Don't be afraid to fail.
-
Be patient.
-
Have fun
Statistics
- The second easiest way to get blurry photos 100% of the time is to use a cheap filter on the front of your lens. (photographylife.com)
- That's the easiest way to get blurry photos 100% of the time. (photographylife.com)
- By March 2014, about 3 million were purchased monthly, about 30 percent of the peak sales total. (en.wikipedia.org)
- Get 40% off Adobe Creative Cloud(opens in new tab) (creativebloq.com)
External Links
How To
How to take photographs in low lighting conditions
Low-light photography is the art of taking photographs in dark or dimly lit environments. It requires special equipment. The main challenges in this field include controlling exposure, whitebalance, and sharpness. Low light photography can be divided into two categories: ambient and flash. Flash photography works best when there's enough light around. But if there isn't enough natural light, then you'll have to use a flash. You might need a flash if your subject is outside but indoors. Try shooting at night, during the moonlit hours, if you don't need a flash. You'll be able to capture beautiful colors and shadows this way. Another option is to shoot during twilight. Twilight is the time when the sun has set and there's still daylight.
Also, you might want to try long exposures. Long exposures let you capture images even after the shutter has been open several minutes. The shutter must be closed so that the camera only records light that hits the sensor. This light continues to fall onto a photo sensor throughout a prolonged exposure. The shutter was not opened, so no new light entered the lens. This means that you will not see any movement. To ensure you're getting a clear image, turn off any automatic settings like autofocus and auto exposure. Make sure to adjust the ISO setting before starting to shoot. An ISO setting of 200 allows you to adjust how bright or dark the image looks. The shutter button should be pressed quickly when you are ready to take the photo. This causes the shutter to close completely. Then, you should hold the shutter button until the last possible second. You can prevent any additional light entering your camera by holding the shutter button down. Once you have taken your picture, wait for a few moments before you release that shutter button. This will allow the camera to process your image. While waiting, you can check out your photos on your computer screen. Save them once you are satisfied with them.