First, you have to take a few steps before you start creating your first time-lapse video. First, make sure your camera has time-lapse capability and is stable. First, take some tests shots. You can also experiment with shutter speeds to get the right look for your time-lapse video. Finally, ensure you get the right lighting conditions and that you don't miss any shots. Follow these steps to produce your own time lapse video.
Stabilizing your camera
Stabilizing the camera is an important step in shooting a time lapse. If you are using a tripod, this is particularly important. Your frames will look different if your camera is not stable. Fortunately, there are some post-processing techniques that will help you stabilize your time-lapse images. Learn more about them below. This will enable you to create a smooth and stable image, which is perfect for time-lapse photography.
Making a time-lapse video
Time-lapse videos can only be created if the subject changes over time. Sunrises and Sunsets, stars moving, or people acting are all great subjects. Hyperlapse is a technique that uses a camera equipped with a motion sensor to allow the camera's movement. It takes a few basic pieces of equipment to make a time-lapse movie.
Deflickering
Time-lapse videography is one of the most powerful tools in cinematography. However, flickering artifacts can ruin your videos. Even though experts know how to avoid flickering in videography, it is possible for beginners to have different exposures. Rob Nelson has created a time-lapse guide to de-flickering. The troubleshooting process is explained in detail below.
Taking test shots
Test shots are an excellent way to get a feel for the time-lapse project. If you want to know how your camera performs, taking test shots is an invaluable tool. You should take test shots for many reasons. These include checking the overall exposure, composition, horizon level, battery life, and the battery life. You can also adjust your settings before the actual event. It's important to select a subject that changes over the course of time for time-lapse photography. Whether you're shooting a city skyline, sunset, or a changing beach, it's crucial to choose a subject that changes over time. Composition is also important for a time-lapse photo, so make sure to frame your shots using the rule of thirds. Don't add distracting elements into your shots.
Composition considerations
Here are some tips to help you create time-lapse videos. Shot composition refers the arrangement of the imagery within the frame. A time-lapse video shows how the motion of a car or subject changes over time. Although you can use any lens for creating a time-lapse movie, it is recommended to use a full-frame camera.
Lighting
Lighting a time-lapse photo can be a challenging project. You will need to adjust your shutter speed and aperture to achieve the best results. One of the biggest challenges is dealing with flicker, a discrepancy between successive shots caused by the movement of the shutter or lens. You can adjust the shutter speed and aperture combination in the manual. However, there are many ways to achieve the perfect exposure.
FAQ
Which Lenses should I Use?
Beginners often ask, "What lens should I purchase?" It's a tough decision since there are so many options available.
The good news is you don't always need to buy a different lens with every purchase of a camera. You can instead add lenses later.
There are three types possible lenses.
-
Wide Angle Lens (14mm to 24mm): These lenses allow you to see more of your subject from a wider angle. Zooming in can be done without affecting image quality.
-
Normal/Standard Zoom Lens (28mm - 70mm): These lenses allow you to change focal lengths while maintaining image quality.
-
Telephoto Zoom Lens (70mm-200mm): These lenses can be used to capture distant subjects. These lenses allow you to focus on your subject, even though they may appear small in the frame.
These lenses can be combined in a variety of ways to create new effects. Combining lenses can create different effects. For example, a normal lens could be used to capture small details while a telephoto lens is used to capture faraway objects.
What camera should I get?
It all depends on your goals and what type of photographer you are. If you're just getting started, a basic point and click camera will suffice.
Once you have mastered the basics you will likely need something more advanced. Personal preference is the only way to decide.
Here are some things to consider before purchasing a camera.
-
Features: What features will you require? Will you use manual settings or autofocus? What number of megapixels has your camera? Is there a viewfinder on your camera?
-
Price: How much do you want to spend? Are you planning on upgrading your camera every two years?
-
Brand: Is it possible to be happy with your brand choice? You don't have to settle for anything less than the best.
-
Functionality: Can your camera function well in low light conditions Can you take high-resolution photos?
-
Image Quality: How sharp and clear are your images?
-
Battery Life: How much time will your camera last without needing to be recharged?
-
Accessories: Can you attach extra lenses, flashes or other accessories? ?
Which camera is best for beginners?
The best camera to use for beginners is dependent on your needs, budget, and skill level.
You might consider a point-and shoot digital camera if you are trying to save money. These cameras are not very versatile but offer excellent quality.
The Digital Single Lens Reflex (Digital DSLR) camera allows you to interchange lenses, allowing you to take different kinds of photos. They usually cost more than point-and-shoots but give you much greater flexibility.
For beginners to photography, the beginner's set is a great place for you to start. The package includes everything you need: a camera, lens, memory cards, tripod, flash and a camera body.
You should also remember to buy additional batteries.
How can I improve my smartphone's photography skills?
Great photos don't require expensive equipment! Amazing photos can be taken with your smartphone.
It's easy to get started with the software.
There are many apps available for both Android and iOS devices that make it easy to edit and share your pictures.
Here are five tips for taking better pictures.
-
Set Up Your Camera App. The camera app should be pre-installed on the device. If not, download it from Google Play or Apple's App Store.
-
Use Effects & Filters. You can alter the appearance and feel of your photo using filters and effects.
-
Adjust Exposure. You can adjust the exposure to control the brightness of your photo.
-
Shoot In The Right Light. It is easier to see details when you shoot in bright light. You can capture highlights and shadows in low-light conditions.
-
Photograph People. It is a great way to share your love with others by taking pictures of them.
You can learn more about how to capture better photos by checking out our article, 5 Tips To Improve Your Photography Skills on a Smartphone
What makes a camera bag good?
A camera bag protects your gear and is essential when traveling. Here are some things to remember when buying a bag.
-
Size: Choose a big bag to hold your camera and accessories comfortably. Don't get any bigger than you really need.
-
Durability: Buy bags made of durable materials like canvas, nylon or leather. Avoid plastic and fabric bags.
-
Protection: Make sure your bag protects against dust, dirt and moisture.
-
Organization: You can organize your gear by category to make it easier for you to find the right thing. So, you can place your lenses in one box, your memory cards in another and your battery charger in a third.
-
Comfort: Keep your hands free when shooting by using a shoulder strap instead of a handbag. A comfortable design should have padded straps.
-
Price: Shop around to find the best price. Many brands offer their products at discounted prices. This can be a huge advantage.
-
Warranty: Make sure to ask if they offer a warranty for their products. This will allow you to know who to contact if your bag becomes damaged.
What is the rule for thirds in photography?
The rule of thirds can be used to create beautiful compositions, without having to use complicated camera settings. It divides your photo into nine equal parts horizontally as well vertically. This creates three main areas in which you want your subject. These are the top and middle thirds (in the upper left corner), as well as the bottom and lower right. You can use these areas as guides for positioning your subject within your frame.
The rule of threes can also help you avoid placing important items too close together. They may not be able to create a strong visual impact if they are too close together. They may lose focus if they're too far apart.
Statistics
- In this case, 100% of readers who voted found the article helpful, earning it our reader-approved status. (wikihow.com)
- Get 40% off Adobe Creative Cloud(opens in new tab) (creativebloq.com)
- While I cannot prove that all of those spots were not sensor dust, the photo was taken during a heavy snowstorm…so I guess that 99.8% of the spots are snowflakes. (bhphotovideo.com)
- The second easiest way to get blurry photos 100% of the time is to use a cheap filter on the front of your lens. (photographylife.com)
External Links
How To
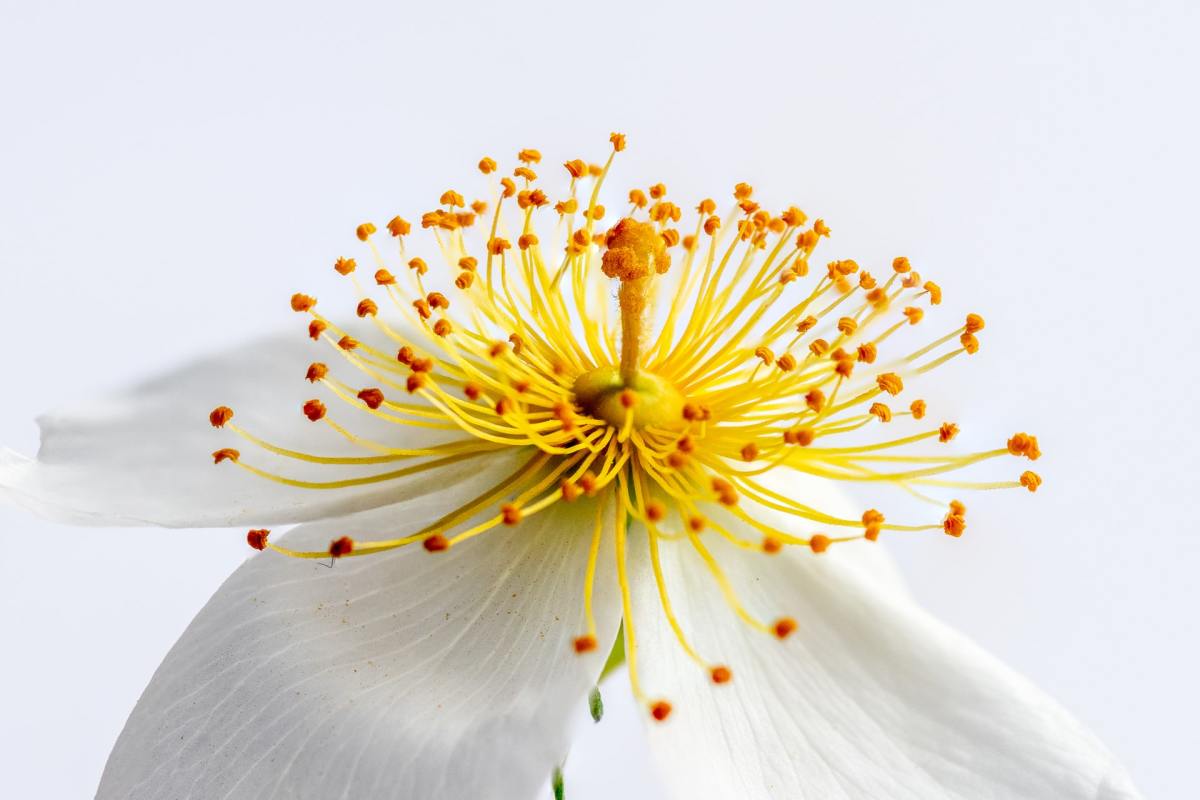
How to take macro shots in photography
Macro photography is the ability to capture small objects, such as insects and flowers, at close range. Macro means large in Greek. When you use a lens with a focal length greater than 50mm, you can take pictures of things that are very close up.
A good macro lens should have a long working distance and a fast aperture, so you can get sharp images without moving around too much. Because of the possibility of blurring your image from movement, you should avoid taking photos while moving.
Here are some tips for taking great macro photographs:
-
Use a tripod. Use a tripod. This will make it less likely that you are moving when shooting.
-
Choose the right lighting. Most macro lenses come with built-in light filters, but if you don't have one already, buy one separately. It prevents overexposure.
-
Be patient! Shooting macros takes practice. Sometimes you might only be able see a very small insect or flower. However, it's worthwhile to keep shooting until it appears.
-
RAW files are best for shooting. RAW files contain more data than standard JPEGs, storing more detail. RAW files allow you to make changes such as cropping, color correction and other adjustments later.
-
Remember to include the background. The background can be as important as the foreground. You should include it in any photo.
-
Keep learning.